

Service Area
Brainerd Lakes Area

Business Hours
MON-FRI: 7AM - 5PM
Address
10374 Business 371
Business Hours
M - F: 8am - 5pm
Welcome to our Blog
The Brainerd Boulders Blog
Master the Basics of Stone Retaining Wall Construction Today
How to Build a Stone Retaining Wall: Step-by-Step Guide for Beginners With DIY Tips and Materials
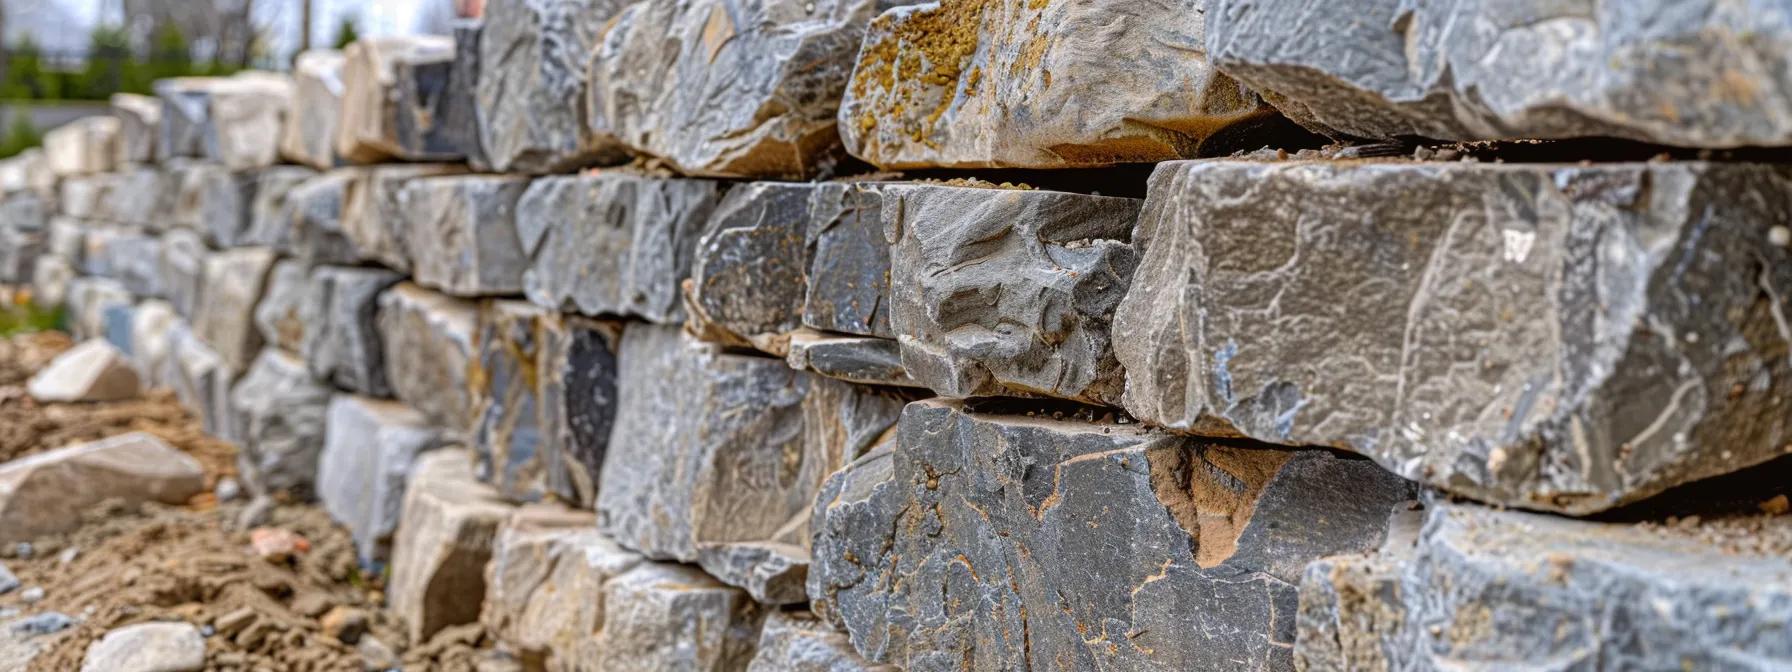
Building a stone retaining wall is a great way to enhance your landscape, control erosion, and create attractive outdoor features. Whether you plan to use stone blocks for sale, garden wall stone, or create a dry stack stone wall, this guide provides clear, step-by-step instructions to help you design and construct a durable wall. Even beginners can gain the necessary skills while working within budget and complying with local regulations.
What Are the Essential Planning Steps for Building a Stone Retaining Wall?
Proper planning is the foundation of a successful stone retaining wall project. Begin by defining the wall’s purpose and location. Consider your landscape’s slope, drainage, and soil conditions to decide if the wall will be decorative or serve a structural function such as preventing erosion.
How Do You Determine the Purpose and Location of Your Retaining Wall?
Identify areas prone to soil erosion or places that need a level planting bed. For example, a wall might demarcate a terraced garden or barrier a sloping lawn. Evaluate the topography, sunlight exposure, and drainage patterns to determine if additional reinforcements like geogrid are necessary. Also, plan for integration with other features—such as a retaining wall
or fire pit—to enhance both aesthetics and functionality.
How to Calculate the Size and Height of Your Stone Retaining Wall?
Measure the wall’s length along the intended area and set the desired height based on the slope gradient, which determines the soil volume to be supported. Whether using pavestone wall block or dry stack stone wall techniques, accurate sizing is critical for ordering the right quantity of stone and gravel. Simple geometry helps ensure the base is wide enough with a slight backward lean for stability. Note that a taller retaining wall requires proper drainage and reinforcement to prevent pressure build-up.
What Local Building Codes and Permits Should Beginners Know?
Before starting, research local building codes and obtain necessary permits. Regulations may cover setbacks, maximum retaining wall heights, and drainage requirements to avoid water damage to neighboring properties. Compliance with these codes ensures safety, prevents costly modifications, and may require professional engineering approval for taller walls.
Which Materials Are Needed for a Durable Stone Retaining Wall?

Choosing the right materials is key to creating a durable and visually pleasing retaining wall. Quality stones, effective drainage materials, and reliable bonding agents ensure the wall withstands weather, soil pressure, and time.
What Are the Best Stone Types for Retaining Walls: Granite, Limestone, or Fieldstone?
Select stones based on durability, appearance, and local availability. Granite is exceptionally durable and weather-resistant, ideal for high-traffic areas. Limestone offers a warmer tone that works well in garden aesthetics, while fieldstone provides a natural, rustic look suited for dry stack construction due to its interlocking properties.
What Drainage Materials Are Required to Prevent Wall Damage?
Proper drainage is crucial. Use gravel, crushed stone, and landscape fabric to create a system that directs water away from the retaining wall . Perforated pipes at the base can further enhance drainage and prevent water accumulation, which may otherwise lead to hydrostatic pressure and wall failure. Incorporating geogrid alongside these materials helps distribute soil load effectively.
Are Mortar and Adhesives Necessary for Stone Retaining Walls?
The choice to use mortar depends on the construction method and desired appearance. Dry stack walls rely on interlocked stones, while mortar is used when a more refined finish or extra stability is needed, especially in high-load situations. Mortar helps fill gaps and secure irregular stones, but may not be essential if natural movement is preferred.
What Tools Do You Need to Build a Stone Retaining Wall?
Using the correct tools makes the wall-building process efficient and ensures a quality finish.
Which Basic Tools Are Essential for Beginners?
Essential tools include:
A sturdy shovel for excavation
A pickaxe to break hard soil
A wheelbarrow for material transport
A tape measure for accurate placement
A masonry trowel for spreading mortar
A saw for trimming stones
A manual or power drill for securing reinforcements
These basic tools provide the foundation needed for constructing a structurally sound and attractive wall.
How to Use a Level, Shovel, Tamper, and Sledgehammer Correctly?
A level confirms that each stone is horizontal. Use a shovel to clear debris and define the excavation area, and a tamper to compress the soil base. A sledgehammer can help set stones precisely. Proper and safe handling of these tools minimizes errors and maintains design integrity.
What Safety Gear Should You Wear When Building a Stone Wall?
Wear work gloves to protect your hands, safety goggles for eye protection, and a hard hat if there’s any overhead hazard. Steel-toed boots safeguard against heavy falling objects, and ear protection is advised when using power tools. Additionally, a dust mask might be necessary in dusty conditions. This gear ensures both safety and professionalism during construction.
What Are the Step-by-Step Construction Stages for Building a Stone Retaining Wall?

Following a clear sequence during construction is crucial for a durable finish.
How to Excavate Properly for a Stone Retaining Wall?
Start by excavating along the planned retaining wall line. Remove debris, vegetation, and excess soil to create a flat base. Excavate to a depth that allows space for both the wall’s base and a drainage layer. The trench should be wider than the wall to accommodate any edge stones.
How Do You Build a Solid and Level Base for the Wall?
Layer a sub-base of compacted gravel or crushed stone. Use a tamper to ensure even compaction, checking frequently with a level tool. A properly compacted and level base is essential to prevent future settlement and structural failures.
What Is the Best Method for Laying Stones and Ensuring Stability?
Begin by placing the largest and flattest stones in the first course. Arrange stones in a staggered pattern to distribute weight naturally. If using mortar, apply it consistently between stones. In dry stack construction, allow stones to interlock naturally and set them with a slight backward lean. Periodically check with a level to ensure the wall remains plumb and even.
How to Backfill and Install Drainage Behind the Wall?
After stone placement, backfill behind the wall with a mix of gravel and sand in layers, compacting each layer thoroughly. Installing a perforated drainage pipe at the base of the backfill directs water away from the structure. Cover the pipe with landscape fabric to prevent soil clogging. This method relieves water pressure and secures the wall’s longevity.
How Do You Finish and Maintain the Stone Retaining Wall?
Finish by cleaning the wall’s face and applying any necessary mortar joints or sealants for a uniform look. Regular maintenance is important—inspect the wall periodically, address minor cracks, and ensure drainage systems remain clear. In cold climates, use soft tools for snow removal to avoid damaging the wall.
What Common Mistakes Should Beginners Avoid When Building a Stone Retaining Wall?
Avoiding common pitfalls will help ensure a durable, low-maintenance wall.
How to Prevent Structural Failures and Wall Collapse?
Key mistakes include neglecting proper planning and inadequate base preparation. Always accurately calculate the expected load and ensure the base is strong enough. Reinforce taller walls with concrete or rebar and check levels during construction to prevent shifting. Consulting local codes and professionals can also minimize risks.
What Are Typical Drainage Problems and How to Fix Them?
Poor drainage can lead to water build-up and hydrostatic pressure. Use proper backfill materials like gravel or crushed stone, install perforated pipes, and cover them with landscape fabric to prevent soil blockage. Regular maintenance of the drainage system is vital to prevent sediment build-up.
How to Avoid Material and Tool Selection Errors?
Select high-quality materials from reputable suppliers. Using low-grade stone or mortar can weaken the wall. Ensure you use proper, effective tools (like the correct type of shovel and compactor) to avoid slowing progress or compromising quality. Research and seek advice from experienced builders or stone wall contractors when uncertain.
How Do You Calculate Materials and Estimate Costs for Your Stone Retaining Wall?

Accurate material calculation and budgeting help manage costs and avoid overspending.
How to Measure and Calculate the Amount of Stone and Gravel Needed?
Measure the wall’s length, height, and thickness to estimate its volume. Convert this volume into the number of stone blocks or loose stones required using manufacturer charts. Calculate the needed gravel or crushed stone based on your trench dimensions (usually in cubic yards) and allow for a 10% waste margin.
What Is the Average Cost Range for DIY Stone Retaining Walls?
DIY stone retaining walls typically range from $15 to $30 per square foot, including quality stone, drainage materials, and mortar. Rentals for specialized tools may add to costs. Comparing quotes from stone wall contractors near me or local suppliers can help refine your budget.
How to Budget for Tools, Materials, and Potential Professional Help?
Break down your budget into categories for materials, tools, and labor if needed. Include a contingency of 10-15% for unexpected expenses such as additional stabilization or repairs. Research local supplier prices and, if necessary, seek professional consultation for complex aspects of the project.
How Can You Build a Stone Retaining Wall on a Slope or Uneven Ground?
Building on a slope or uneven terrain requires special techniques to ensure stability and proper drainage.
What Are the Key Techniques for Building on Sloped Terrain?
On a sloped site, begin with a detailed survey to understand the gradient. Excavation should follow the natural contour, creating stepped or tiered sections. Adjust the design by thickening the base on the lower side and incorporating a slight backward lean in each course. Building in tiers can make construction more manageable while providing natural drainage channels.
How to Ensure Proper Drainage and Stability on a Slope?
On slopes, drainage is even more critical due to gravitational forces. Install drainage pipes along the base of each tier and use layers of gravel and landscape fabric to channel water away. Reinforce the structure using geogrid where soil erosion is pronounced, and inspect drainage systems regularly to prevent water build-up.
What Additional Materials or Tools Are Needed for Sloped Walls?
For sloped walls, you may need additional tools such as laser levels for accurately gauging inclines and specialized excavation equipment to handle variable soil depths. Extra gravel, a longer drainage pipe, and additional geogrid may also be required. Manufacturer guidelines for retaining wall blocks or veneer stone systems can offer insights into necessary supplements.
Frequently Asked Questions
Q: How long does it take to build a stone retaining wall? A: Construction typically takes a few days to a couple of weeks depending on the wall’s size, complexity, and your experience. Factors such as excavation, material procurement, and weather can affect the timeline.
Q: Can I build a stone retaining wall without professional help? A: Yes. Many homeowners successfully build stone retaining walls themselves with proper planning, accurate material calculations, and adherence to local codes. For larger or complex walls, consulting a professional is advisable.
Q: What maintenance does a stone retaining wall require? A: Regular maintenance involves inspecting for loose or shifting stones, checking drainage systems, and cleaning debris. Repointing of mortar joints may be needed over time, as well as addressing minor repairs before they worsen.
Q: How do I know if my retaining wall is structurally sound? A: Look for signs of movement such as cracks, bulging, or tilting. Proper drainage should prevent water buildup. If deterioration is significant, consult a professional engineer or a reputable stone wall contractor for an evaluation.
Q: What is the cost difference between a dry stack and a mortared stone retaining wall? A: Dry stack walls are generally less expensive in materials and allow natural movement, while mortared walls require additional labor and cost for mortar. Local prices and labor rates will influence the final cost.
Q: How do local building codes impact the design of my stone retaining wall? A: Local codes set guidelines on wall height, setbacks, drainage, and safety. These regulations ensure legal compliance and structural integrity, so check with your local building department before starting.
Q: Can a stone retaining wall be used for both decorative and functional purposes? A: Absolutely. Many walls are designed to provide structural support while enhancing the visual appeal of your property. The choice of stone, finish, and design can be tailored to meet both functional and aesthetic needs.
Final Thoughts
This guide provides a comprehensive roadmap for building a stone retaining wall. By carefully planning, selecting quality materials, using the correct tools, and following the construction stages, you can create a durable and attractive structure. Regular maintenance and adherence to local codes will ensure your patio remains a lasting enhancement to your property, reflecting both style and robust construction.


Working Hours
Mon: 7am - 5pm
Tues: 7am - 5pm
Wed: 7am - 5pm
Thur: 7am - 5pm
Fri: 7am - 5pm
Sat: Closed
Sun: Closed